


Photo by Markus Winkler on Unsplash
Jackson's @JsonView with SpringBoot Tutorial
Taking a look at the features of @JsonView and how to implement them in a real Project


Table of contents
- Introduction
- Summary of Important Points regarding JsonView
- Detailed Implementation and Tutorial
- Level 1 : JsonView with a Single Class
- Takeaway from Level 1
- Level 2 : JsonView with multiple classes
- Level 3: Using Entities with JsonView
- Conclusion
Introduction
If you are a SpringBoot dev and you work on a large project, you ought to know about the annotation provided by Jackson -@JsonView, because it is extremely powerful and elegant. @JsonView by Jackson helps selectively serialize and de-serialize objects. By doing so it reduces your code base by a ton by avoiding unnecessary classes and also those irritating getters and setters to copy the values of one object to another.
Real Time Example
Look at the below JSON Object
{
  "userId": "markbdsouza",
  "firstName": "Mark",
  "lastName": "Dsouza",
  "socialMediaAccount: {
     "twitterUrl": "https://twitter.com/MarkBDsouza",
     "githubUrl": "https://github.com/markbdsouza",
     "devUrl": "",
     "hashNodeUrl":""
  },
  "articles": [
     {
        "summary": "JS: Sort an Array of Objects on multiple columns/keys",
        "url": "https://dev.to/markbdsouza/js-sort-an-array-of-objects-on-multiple-columns-keys-2bj1"
     },
     {
        "summary": "Spring Cloud Config Server: Step by Step",
        "url": "https://dev.to/markbdsouza/spring-cloud-config-server-step-by-step-14fd"
     }
  ]
}
Here, we have a Json Object User. We see one User has a single SocialMediaAccount Object(OneToOne Relationship) and one Customer has multiple articles (OneToMany Relationship). In Java, for this structure, we would need 3 Classes - User, SocialMediaAccount, Article. The 3 Classes would be as below
public class User{
  private String userId;
  private String firstName;
  private String lastName;
  private SocialMediaAccount socialMediaAccount;
  private List<Article> articles;
  // excluding getters and setters for brevity
}
public class SocialMediaAccount {
  private String twitterUrl;
  private String githubUrl;
  // excluding getters and setters for brevity
}
public class Article{
  private String summary;
  private String url;
  // excluding getters and setters for brevity
}
How JSonView Helps
Now with this one structure, we can JSON Objects containing any combination of fields to form the below JSON from endpoint 2
{
  "userId": "markbdsouza",
  "socialMediaAccount: {
     "twitterUrl": "https://twitter.com/MarkBDsouza"
  },
  "articles": [
     {
        "summary": "JS: Sort an Array of Objects on multiple columns/keys",
        "url": "https://dev.to/markbdsouza/js-sort-an-array-of-objects-on-multiple-columns-keys-2bj1"
     },
     {
        "summary": "Spring Cloud Config Server: Step by Step",
        "url": "https://dev.to/markbdsouza/spring-cloud-config-server-step-by-step-14fd"
     }
  ]
}
OR the below structure from end point 3
{
  "userId": "markbdsouza",
  "firstName": "Mark",
  "socialMediaAccount: {
     "twitterUrl": "https://twitter.com/MarkBDsouza",
     "githubUrl": "https://github.com/markbdsouza",
     "devUrl": "",
     "hashNodeUrl"
  }
}
OR any other structure consisting of the same variables in whatsoever permutation/combination. The business logic for all endpoints can be exactly the same. The only difference is the annotation that needs to be provided such that when converting POJO to JSON or vice versa, Jackson will check which fields need to included when serializing/de-serializing. That way we do not have to create any new Class with the specific structure and then copy the data from the original object to the new class object for each endpoint.
Summary of Important Points regarding JsonView
The below points serve as a quick summary of everything you probably need to know about JsonView to get started with implementation.
- A View in JsonView defines how you want to expose a Class when it is converted from POJO to JSON by the Jackson package. Jackson will serialize/de-serialize only the fields with the corresponding
@JsonView. - Create a simple Java class(no class level annotation required) that will hold with interfaces/child classes which are our View Names. We can use inheritance so View 2 also includes everything present in View 1. This is helpful when you are building a new View that extends the fields visible in an already existing View.
public class Views{ public interface Public{} public interface CustomerDetails extends Public{} } - Once the View class is created, annotation is required at 2 places. 1) The Class itself or the instance variables of the Class that needs to be serialized/de-serialized. 2) At the endpoints in your controller so Jackson knows where to apply the View.
- At the Class level(of what we are serialzing/ de-serializing), we need to annotate the required instance variable with
@JsonView(Views.Public.class)whereViewsis the class created in the above step andPublicis the interface/subclass created in it. This is what tells Jackson which instance variable of the class to serialize/de-serialize. Example :@JsonView(Views.Public.class) private String firstName; - One instance variable can have any number of JsonViews attached to it.
Example:
@JsonView({Views.Public.class, Views.UserDetails.class}) private String email; - If we have an object of Class B as an instance variable of class A. And have attached
@JsonViewto the object, it will internally also serialize/de-serialize only the annotated instance variables in class B. Example:public class A{ @JsonView(Views.Public.class) private B b; }class B{ private String password; // will not be included by jackson @JsonView(Views.Public.class) private String username; }@JsonViewin class B, then no field will get serialized/de-serialized of B and it would be an empty object when A gets serialized/de-serialized. - Alternatively, we can assign the annotation to the entire class as well.
- In the controllers, we need to annotate the endpoints accordingly so Jackson knows which endpoints have the logic while converting POJO to JSON or vice versa.
- For GET endpoints, if we are returning a class and want to provide only visible fields, we annotate the end point with
@JsonView(Views.Public.class) @GetMapping("/1") public Customer getDetails() { // business logic to return customer } - If we are returning the same class in another endpoint, it is not necessary that we have
@JsonView. If your controller does not have@JsonView, all fields of the POJO returned will be converted to JSON. - If it is a HTTP POST call and we are sending the class in our body, using
@JsonViewwe can accept only the fields mentioned in our View. To do this@PostMapping public Student postLevelTwoBasic(@RequestBody @JsonView(LevelTwoViews.Public.class) Student student) { // some POST implementation }
Detailed Implementation and Tutorial
In the below section, we will walk through some code and set up JsonView and see how we can use it. You can find the github link with the entire code : github.com/markbdsouza/jsonview-springboot-.. The tutorial has been split into 3 levels. We will increasingly use more features and explore other uses of JsonView.
Level 1 : JsonView with a Single Class
To start off, we will create a Single JAVA Class and use JsonView annotation on it. We will be checking both GET as well as POST requests and see how it all works together. In future levels, we will try multiple classes and even entities.
Step 1.1 : Create JsonView Class
Create the Class containing the different views that need to be created. Observe how we use inheritance in these interfaces. Public is kept as the base View. We have 2 different views that inherit Public - UserNameDetails and OtherDetails. And UserDetails extends UserNameDetails so it extends Public inherently.
public class LevelOneViews {
    /*
     * Any variable associated with Public will be picked up by this view
     */
    public interface Public {
    }

    /*
     * Any variable associated with UserNameDetails or Public will be picked up by this view
     */
    public interface UserNameDetails extends Public {
    }

    /*
     * Any variable associated with UserDetails, UserNameDetails or Public(since UserNameDetails internally
     *  extends Public)  will be picked up by this view
     */
    public interface UserDetails extends UserNameDetails {
    }

    /*
     * Any variable associated with OtherDetails or Public will be picked up by this view.
     * Note: Will not pick up variables associated with UserNameDetails or UserDetails
     */
    public interface OtherDetails extends Public {
    }
}
We have created 4 views here. Take a minute to see the inheritance and understand the inheritance tree.
Step 1.2 : Create Java Class with the @JsonView on required variables
Create User class with instance variables with the Views created in the above step
@Data
@ToString
public class User {
    @JsonView({LevelOneViews.Public.class})
    private int userId;
    @JsonView(LevelOneViews.UserNameDetails.class)
    private String firstName;
    @JsonView(LevelOneViews.UserNameDetails.class)
    private String lastName;
    @JsonView({LevelOneViews.UserDetails.class, LevelOneViews.OtherDetails.class})
    private String email;
    @JsonView({LevelOneViews.UserDetails.class, LevelOneViews.OtherDetails.class})
    private String organization;
    private Boolean isActive;
}
Step 1.3 : Create Controller and GET Endpoints
Create endpoints with the 4 views created. We have a private static method to create an Object of User. Note that for all methods the implementation is the same. We only call the createUser() method. The only difference in all methods is which View we are using. For each of these GET mappings using JsonView we need to annotate the entire method with @JsonView with the view. Example: @JsonView(LevelOneViews.UserNameDetails.class)
@RestController
public class UserController {

    /**
     * GET without any view
     *
     * @return created User
     */
    @GetMapping("/levelOne/default")
    public User getLevelOneUser() {
        return createUser();
    }

    /**
     * GET with Public View
     *
     * @return created User
     */
    @JsonView(LevelOneViews.Public.class)
    @GetMapping("/levelOne/public")
    public User getLevelOnePublicUser() {
        return createUser();
    }

    /**
     * GET with UserNameDetails View which extends Public
     *
     * @return created User
     */
    @JsonView(LevelOneViews.UserNameDetails.class)
    @GetMapping("/levelOne/name")
    public User getLevelOneNameUser() {
        return createUser();
    }

    /**
     * GET with UserDetails  View which extends UserNameDetails and also Public
     *
     * @return created User
     */
    @JsonView(LevelOneViews.UserDetails.class)
    @GetMapping("/levelOne/details")
    public User getLevelDetailsUser() {
        return createUser();
    }

    /**
     * GET with OtherDetails View which extends Public
     *
     * @return created User
     */
    @JsonView(LevelOneViews.OtherDetails.class)
    @GetMapping("/levelOne/other")
    public User getLevelOneOther() {
        return createUser();
    }

    /**
     * @return created user
     */
    private static User createUser() {
        User user = new User();
        user.setUserId(1);
        user.setFirstName("Mark");
        user.setLastName("Dsouza");
        user.setEmail("mark.benjamin.dsouza@google.com");
        user.setIsActive(true);
        user.setOrganization("DEV.TO");
        return user;
    }
}
There are 5 endpoints. 1 without a view and 4 with.
Step 1.4 : Test the GET Endpoints
Run the springboot application and lets test out our endpoints.
Endpoint 1: Without any View
All fields of our User Object will get deserailized
localhost:8080/levelOne/default

Endpoint 2: With Public View
Public View is our basic default view that has the least number of variables
localhost:8080/levelOne/public
 Notice how only the userId column is returned even though the code for both endpoint 1 and 2 are exactly the same. This is done through JsonView.
Endpoint 3: With UserNameDetails View
localhost:8080/levelOne/name
 UserNameDetails extends Public. So, through inheritance, it displays all fields with UserNameDetails as well as Public. So we see 3 fields in our response.
Endpoint 4: With UserDetails View
localhost:8080/levelOne/details
 UserDetails extends UserNameDetails which through inheritance means UserDetails extends Public as well. So all fields with UserDetails,UserNameDetails and Public will be available in the response.
Endpoint 5: With OtherDetails View
localhost:8080/levelOne/other
 OtherDetails does bit extend the above views, instead only the Public View. So Only fields with either OtherDetails or Public will be available in the response.
Step 1.5 : Add POST Endpoints
    Logger log = LoggerFactory.getLogger(UserController.class);
    /**
     * POST without any view
     *
     * @param user
     */
    @PostMapping("/levelOne/default")
    public User postLevelOneDefault(@RequestBody User user) {
        log.info(String.valueOf(user));
        return user;
    }

    /**
     * POST with Public view
     *
     * @param user
     */
    @PostMapping("/levelOne/name")
    public User postLevelOneDetails(@RequestBody @JsonView(LevelOneViews.UserNameDetails.class) User user) {
        log.info(String.valueOf(user));
        return user;
    }
Step 1.6 : Test the POST Endpoints
Endpoint 1: Without any Views
Post call to URL:localhost:8080/levelOne/default
Request Body:
 We are sending the entire structure.
Logger:
We are sending the entire structure.
Logger: User(userId=1, firstName=Mark, lastName=Dsouza, email=mark.benjamin.dsouza@google.com, organization=DEV.TO, isActive=true)
All data gets logged.
 All data gets returned.
Endpoint 2: With JsonView
Let us not try this with JsonView endpoint
Post call to URL: localhost:8080/levelOne/name
 Logger:
 User(userId=1, firstName=Mark, lastName=Dsouza, email=null, organization=null, isActive=null)
Notice how even though we sent an entire object only 3 fields got de-serialized.
 The response is what we saw in the logs. The controller itself did not recieve all fields, so only some fields which are linked with the corresponding view got de-serialized.
Takeaway from Level 1
We saw what classes are needed for implementing JsonView and how we can use it for HTTP GET as well as POST requests. We needed to add annotation to the Class that is being serialized/de-serialized as well as the controller endpoint/API. Also, when defining views and using them, inheritance can be used such that one field is associated with multiple views easily.
Level 2 : JsonView with multiple classes
In this level, we are going to see how things work when it isn't just a simple Java Class with just Strings and numbers. Let's see how it works when we have objects of other classes as well. These are generally OneToOne(Single Object) and OneToMany(List of Object) relationships.
Step 2.1 : Create JsonView Class
Create the Class containing the different views that need to be created.
public class LevelTwoViews {
    /*
     * Any variable associated with Public will be picked up by this view
     */
    public interface Public {
    }

    /*
     * Any variable associated with BasicStudentDetails or Public will be picked up by this view
     */
    public interface BasicStudentDetails extends Public {
    }

    /*
     * Any variable associated with BasicStudentDetails, AllStudentDetails or Public will be picked up by this view
     */
    public interface AllStudentDetails extends BasicStudentDetails {
    }
}
Here, again we have used inheritance and created 3 views of increasing access.
Step 2.2 : Create multiple Java Classes with the @JsonView on required variables
In Level2, we will be creating multiple classes to illustrate how it works
Create Student
@Data
@ToString
public class Student {
    @JsonView(LevelTwoViews.Public.class)
    private String fullName;
    @JsonView(LevelTwoViews.BasicStudentDetails.class)
    private float height;
    @JsonView(LevelTwoViews.BasicStudentDetails.class)
    private float weight;
    @JsonView(LevelTwoViews.Public.class)
    private int age;
    @JsonView(LevelTwoViews.BasicStudentDetails.class)
    private String className;
    // One to Many Relationship
    @JsonView(LevelTwoViews.AllStudentDetails.class)
    private List<SubjectScore> scores;
    // One to One Relationship
    @JsonView(LevelTwoViews.BasicStudentDetails.class)
    private School school;
}
Create School
One Student has One School - One To One Relationship
@Data
@ToString
public class School {

    @JsonView(LevelTwoViews.BasicStudentDetails.class)
    private String schoolName;
}
Create SubjectScore
One Student has multiple Subject Scores - One to Many Relationship
@Data
@ToString
public class SubjectScore {
    @JsonView(LevelTwoViews.AllStudentDetails.class)
    private String subject;
    @JsonView(LevelTwoViews.AllStudentDetails.class)
    private int score;
    private String teacher;
}
Note that teacher has no view. So irrespective of what JsonView we provide at the controller level, teacher will never get serialized/de-serialized
Step 2.3 : Create Controller and GET Endpoints
Create endpoints for the views created. We have a few private static methods to create a dummy Object. Here also for all methods the implementation is the same and the only difference is which View we are using.
@RestController
public class StudentController {

    /**
     * GET without any json view
     *
     * @return created Student
     */
    @GetMapping("/levelTwo/default")
    public Student getLevelTwoDefault() {
        return createStudent();
    }

    /**
     * GET with lowest view Public
     *
     * @return created Student
     */
    @JsonView(LevelTwoViews.Public.class)
    @GetMapping("/levelTwo/public")
    public Student getLevelTwoPublic() {
        return createStudent();
    }

    /**
     * GET with BasicStudentDetails View which extends Public
     *
     * @return created Student
     */
    @JsonView(LevelTwoViews.BasicStudentDetails.class)
    @GetMapping("/levelTwo/basic")
    public Student getLevelTwoBasicDetails() {
        return createStudent();
    }

    /**
     * GET with AllStudentDetails View which extends BasicStudentDetails,Public
     *
     * @return created Student
     */
    @JsonView(LevelTwoViews.AllStudentDetails.class)
    @GetMapping("/levelTwo/all")
    public Student getLevelTwoAllDetails() {
        return createStudent();
    }

    private static Student createStudent() {
        Student student = new Student();
        student.setAge(15);
        student.setFullName("Mark Dsouza");
        student.setWeight(49);
        student.setHeight(150);
        student.setClassName("VIII");
        student.setSchool(createSchool());
        student.setScores(createSubjectScoreList());
        return student;
    }
    private static School createSchool() {
        School school = new School();
        school.setSchoolName("Indian Public School");
        return school;
    }
    private static List<SubjectScore> createSubjectScoreList() {
        List<SubjectScore> subjectScoreList = new ArrayList<>();
        SubjectScore mathScore = new SubjectScore();
        mathScore.setScore(80);
        mathScore.setSubject("Math");
        mathScore.setTeacher("Mr. John Watts");
        SubjectScore englishScore = new SubjectScore();
        englishScore.setScore(80);
        englishScore.setSubject("English");
        englishScore.setTeacher("Mrs. Mary Johnson");
        subjectScoreList.add(mathScore);
        subjectScoreList.add(englishScore);
        return subjectScoreList;
    }
We have created 4 GET Endpoints, one with no view and 3 with the views we created.
Step 2.4 : Test the GET Endpoints
Run the SpringBoot application and let us test out our endpoints for level 2 GET methods.
Endpoint 1: Without any View
Http Method: GET
URL: localhost:8080/levelTwo/default
Response:
 Here we get back all the data of the object and objects children as well.
Endpoint 2: With Public View
Http Method: GET
URL: localhost:8080/levelTwo/public
Response:
We see only data with Public View
Endpoint 3: With BasicStudentDetails
Http Method: GET
URL: localhost:8080/levelTwo/basic
Response:
 Notice how scores isnt included in this view as we have not given the required view for that object in our main class Student.
Endpoint 4: With AllStudentDetails View
Http Method: GET
URL: localhost:8080/levelTwo/all
Response:
 Similarly, here the teacher of class Score is not present as the view wasnt defined.
Step 2.5 : Add POST Endpoints
Now create the POST Endpoints
    Logger log = LoggerFactory.getLogger(StudentController.class);
    /**
     * POST Mapping without any views
     *
     * @param student
     * @return same student
     */
    @PostMapping("/levelTwo/default")
    public Student postLevelTwoDefault(@RequestBody Student student) {
        log.info(student.toString());
        return student;
    }

    /**
     * POST Mapping with Public View. Instance variables of Student without Public view will not be deserialized
     *
     * @param student
     * @return same student
     */
    @PostMapping("/levelTwo/public")
    public Student postLevelTwoBasic(@RequestBody @JsonView(LevelTwoViews.Public.class) Student student) {
        log.info(student.toString());
        return student;
    }
Step 2.6 : Test the POST Endpoints
Endpoint 5: POST without a view
Http Method: POST
URL: localhost:8080/levelTwo/default
Request Body:
 Logger:
 Student(fullName=Mary Jane, height=137.0, weight=34.0, age=16, className=X, scores=[SubjectScore(subject=Math, score=90, teacher=Mr. John Watts), SubjectScore(subject=English, score=40, teacher=Mrs. Mary Johnson)], school=School(schoolName=New York Public School))
We have logged what is recieved by the controller and see all fields hav valid data.
Response:
 We see the same data that is sent is returned completely.
Endpoint 6: POST with a view
Http Method: POST
URL: localhost:8080/levelTwo/public
Request Body: We use the same request as earlier
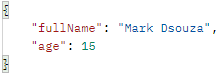
Logger: Student(fullName=Mary Jane, height=0.0, weight=0.0, age=16, className=null, scores=null, school=null)
Notice the difference here, almost EVERYTHING(except fullName and age) is defaulted even though we sent the entire data as the request body. This is where JsonView works its magic. Even though we send all the data, JsonView de-serializes ONLY the data mentioned with the appropriate view(in this case Public, which is givne only to two fields).
Response:
 Since the controller itself didnt get the data, the data returned also is only what was made visible by JsonView.
Takeaway from Level 2
In Level 2, we saw how we can work with multiple Classes and how we can use views across them to achieve the data structure that we need.
Level 3: Using Entities with JsonView
In Level 3, we will use a H2 Database to pick data from instead of just some dummy data. And we will directly use the @JsonView on the Entity itself. This helps us eliminate the use of any DTO, RequestModel, ResponseModel.
Note: The Github code has included data.sql and schema.sql in the src/main/resources folder and some properties in application.properties which will automatically create the schema and insert data into the H2 DB.
Step 3.1 : Create JsonView Class
Create the Class containing the different views that need to be created.
/**
 * List of Views for LevelThree functionality.
 */
public class LevelThreeViews {
    /*
     * Any variable associated with Public will be picked up by this view
     */
    public interface Public {
    }

    /*
     * Any variable associated with CustomerDetails or Public will be picked up by this view
     */
    public interface CustomerDetails extends Public {
    }
We have created 2 views, Public and CustomerDetails.
Step 3.2 : Create Java Entity with the @JsonView on required variables
While creating our Entity, add additional @JsonView for the required instance variables.
@Entity
@Table(name = "customer")
@Data
public class Customer {
    @Id
    @GeneratedValue
    private Long id;
    @Column(name = "CUSTOMER_ID", nullable = false)
    @JsonView(LevelThreeViews.Public.class)
    private String customerId;
    @Column(name = "FIRST_NAME", nullable = false, length = 50)
    @JsonView(LevelThreeViews.CustomerDetails.class)
    private String firstName;
    @Column(name = "LAST_NAME", nullable = false, length = 50)
    @JsonView(LevelThreeViews.CustomerDetails.class)
    private String lastName;
}
The 'id' column does not have any view associated with it. We do not want to expose our DB's Primary Key to any client of our API. Instead we only expose the CUSTOMER_ID which a String value.
Step 3.3 : Create Controller and GET Endpoints
Create endpoints with the multiple views created. Here for all methods, we fetch the data from the DB. The code is exactly the same for all APIs, the only difference is which View we are using.
@RestController
public class CustomerController {
    @Autowired
    private CustomerRepository customerRepository;

    /**
     * GET Mapping without JsonView
     * @return List of Customer inserted in the DB
     */
    @GetMapping("/levelThree/default")
    public List<Customer> getLevelThree() {
        return customerRepository.findAll();
    }

    /**
     * GET Mapping with Public JsonView
     * @return List of Customer inserted in the DB
     */
    @JsonView(LevelThreeViews.Public.class)
    @GetMapping("/levelThree/public")
    public List<Customer> getLevelThreePublic() {
        return customerRepository.findAll();
    }

    /**
     * GET Mapping with CustomerDetails JsonView which extends Public as well
     * @return List of Customer inserted in the DB
     */
    @JsonView(LevelThreeViews.CustomerDetails.class)
    @GetMapping("/levelThree/details")
    public List<Customer> getLevelThreeDetails() {
        return customerRepository.findAll();
    }
}
Overall we have 3 endpoints to see the difference between NoView, PublicView and CustomerDetailsView.
Step 3.4 : Test the GET Endpoints
Run the springboot application and lets test out our endpoints.
Endpoint 1: Without any View
Http Method: GET
URL: localhost:8080/levelThree/default
Response:  All fields are returned since there is no view for this API
Endpoint 2: With Public View
Http Method: GET
URL: localhost:8080/levelThree/public
Response:  Notice that only fields with Public View are returned.
Endpoint 3: With CustomerDetailsView
Http Method: GET
URL: localhost:8080/levelThree/details
Response:  Notice that fields with Public and CustomerDetailsView are returned. But it does not contain the id column since we havent given the annotation and view name for the id column.
Takeaway from Level 3
Level 3 showed us how we can use entities directly and securely hide data that we dont want exposed in any APIs. This includes any sequence generated columns or audit columns or any other column as well. Similar to what we saw in Level 2, we can have related entities as well with OneToOne, OneToMany and ManyToOne Annotations. Side Note: If you are implementing this in your code and have multiple relationships, you could run into a cyclic reference issue during deserialization. Check out JsonManagedReference and JsonBackReference on StackOverflow to solve the issue.
Conclusion
Throughout this tutorial, we have seen different instances of how we can use @JsonView for HTTP calls when it the object is part of a response or the object is part of the request body. We also saw how we can use multiple classes and entities with JsonView.
I hope you find this useful and let me know in the comments or DM me on twitter if you have any questions. Cheers and Happy Coding!